Train, evaluate, interpret and productionize models (Tutorial)#
In the previous tutorials, you learned how to use Simple ML to predict missing values, spot abnormalities in data and to forecast future values. For each of those tasks, without you knowing, Simple ML trained and applied many machine learning models. However, it is sometimes necessary to create, evaluate and use ML models manually. In this tutorial, you will see how to train, evaluate, analyze and interpret, and finally export an ML model into a Colab.
Note
Colab is a popular platform to write programs using the Python programming language to do ML learning work. In this example, the model will be trained with Simple ML for Sheets and then exported to Colab to run inference.
Training a model#
If you have not done it already, make a copy of the tutorial sheet.
The first step is to train your ML model. The tabs “Case #3: Training dataset” and “Case #3: Evaluation dataset” contains respectively a training and testing dataset that you will use to train and evaluate a model.
Select the “Case #3: Training dataset” tab.
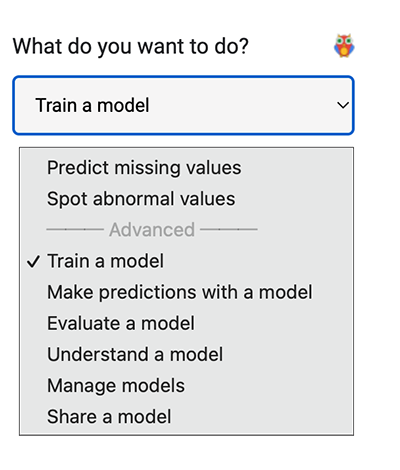
Under What do you want to do? select Train a model.
Name your model “My first model”.
Under Label select species. The model will try to predict the species column.
For now, do not change the source columns or the advanced options.
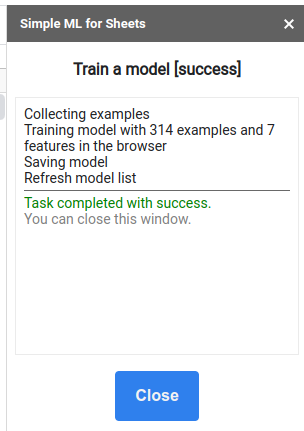
Click Train.
After a few seconds, the model is trained and ready to be used. Press the Close button.
Analyse & Interpret the model#
It is sometimes interesting to understand what is inside a model. Let’s take a look.
Under What do you want to do? select Understand a model.
Under Models select the model you just trained called “My Model”.
Check the box Include sheet data.
Click Understand.
After a few seconds, the model understanding window appears.
In the Summary tab, you can see information about the input features of the model.
In the Quality tab, you can see evaluation metrics about the model. In this case, the evaluation was computed on a validation dataset extracted automatically from the training dataset. Different learning algorithms (in the “advanced options” section) might behave differently.
In the Dataset tab, you can see details about the input features of the model.
In the Variable importance tab, you can see how each feature impacts the
model. For example, the feature variable importance MEAN_DECREASE_IN_ACCURACY
indicate how much the quality of the model would “drop” if the feature was
removed. The features with the highest feature importance are the most important
to the model.
In the Predictions tab, you can see how the prediction of the model is impacted by different feature values.
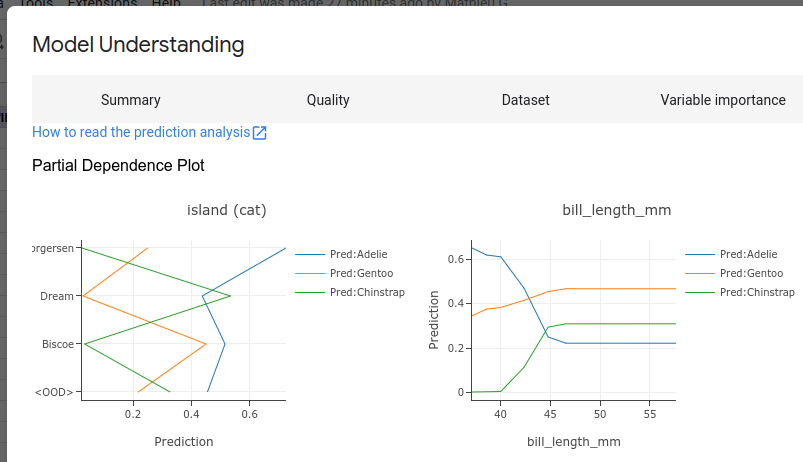
Finally, in the Plot model tab, you can see a representation of the model. Note that only “Decision Tree” models are plotted (to be selected in the “advanced options” when training the model).
Evaluate the model#
Measuring the quality of a model on a test set (also called “hold-out set”) is critical for measuring the overfitting of the model.
Note
During training, a validation dataset is automatically extracted from the training dataset to control the training. The evaluation of the validation dataset is present in the Model Understanding window shown in the previous step. In the current step, the model will be evaluated manually on a new dataset.
Select the “Case #3: Evaluation dataset” tab.
Under What do you want to do? select Evaluate a model.
Under Models select the model you just trained called “My Model”.
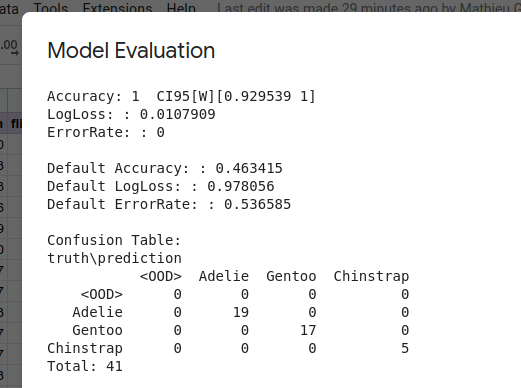
Click Evaluate.
After a few seconds, the model evaluation window appears. Don’t hesitate to scroll to see evaluation plots.
Export model#
For the last step of this tutorial, you will export the model to a Colab.
Select the “Case #3: Evaluation dataset” tab.
Under What do you want to do? select Export a model.
Under Models select the model you just trained called “My Model”.
Under Destination select Colab (External).
Click Export.
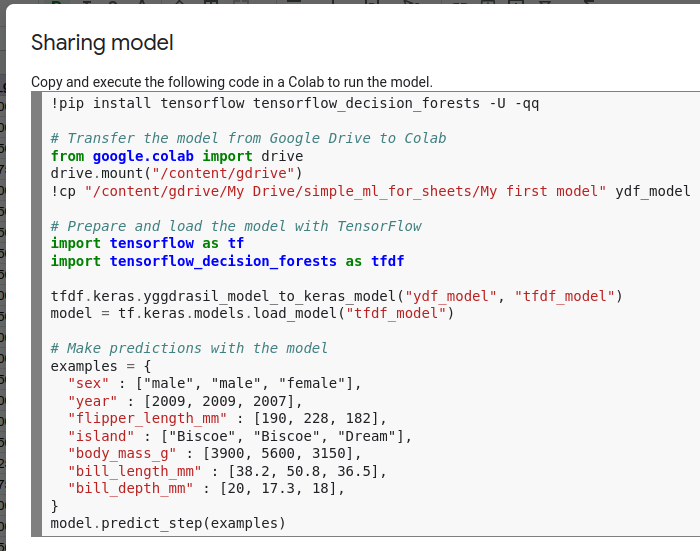
After a few seconds, a window showing a snippet of python code appears. You can paste and run this code in a new Colab document. You will see the predictions of the model.
Note
Model predictions can also be computed in Sheets with Simple ML with the Make predictions with a model task.
Learn More#
If you’re interested in learning about the Decision Forests technology that underlies Simple ML, see the Decision Forests course at developers.google.com/machine-learning/decision-forests.